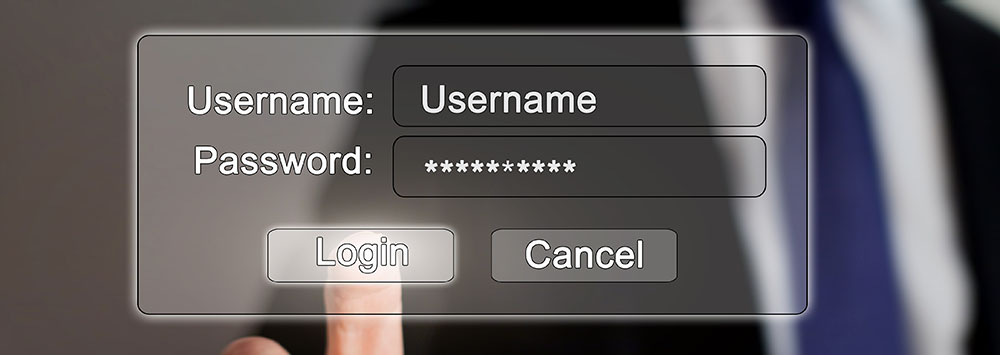
Disable Login Screen
If you’re comfortable with the fact that you do not need the extra security, you might want to disable the login screen on your laptop to make things easier each time you open your mac or PC. In this post, we explain exactly how to turn off password requests for almost any device.
How to Remove a Password from Windows 10
Read on to learn how to skip past the Windows login screen and get instant access to your account immediately.
From Windows 8 through to Windows 10, when you ‘go to my PC login,’ you need to type in your user password before you can log in to the account. This is requested when you shut down or if you simply need to switch accounts. The Windows 10 password screen to log in will appear for any user account that has a password associated with it.
Password security on any device is important, and almost always advisable. However, there are some situations and circumstances that prompt a user to want to perform a Windows 10 auto login. People who are confident in their security and who do not want to have to repeatedly enter their password each and every time they open, close, and boot their PC.
Thankfully, the windows 10 remove password feature is relatively quick and easy to carry out; here’s how.

#1 Go to ‘my PC login’ on your Windows 10 device and log in as normal by inputting your password.
#2 Click ‘start’ or press the Windows key. You will then need to type ‘netplwiz.’ This should them present as a search result in the search function on the search menu, select ‘enter’ on your keyboard to open.
If nothing happens, simply right click on the windows button, and select ‘command prompt,’ then type in ‘netplwiz’ manually.
#3 A new box called ‘User Accounts’ will then pop up. Here, you will be able to see all the users who hold accounts on the PC. Click on your user name in order to select the right account; then you will see a tick box with the sentence ‘users must enter a username and password to be able to access this computer.’
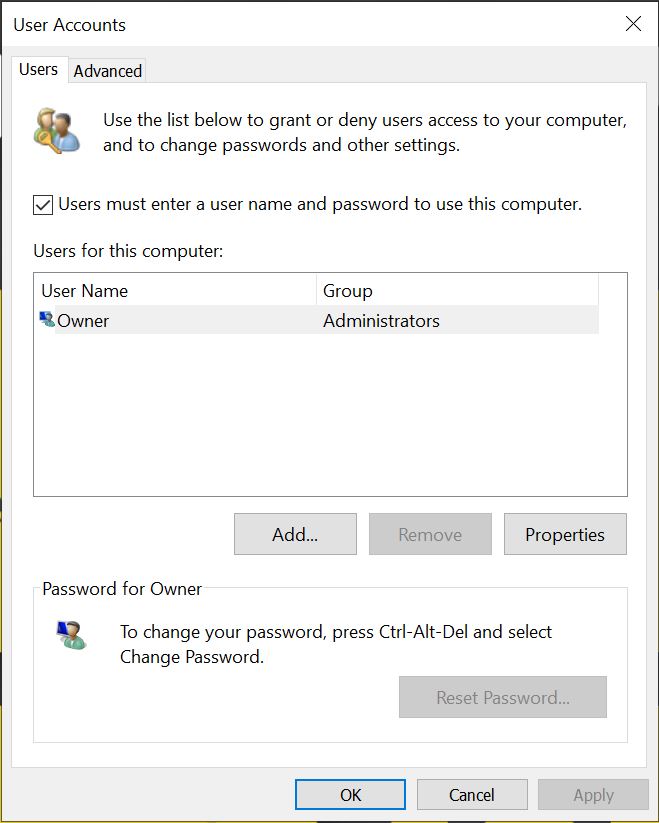
#4 For security, you will need to enter your password twice, then select ‘ok’ to close the window down.
#5 Now you have taken care of the hard part, you can test your Windows 10 auto login by shutting down your PC once you have saved all your work.
As long as you have followed the steps outlined in this section, you should have switched your login off, and windows ten should bypass the login process.
Final Note for New Windows 10 Auto Login Process
When you configure your account to bypass the login process, this will naturally reduce the security on your PC. It is important to note that the changes you make on your PC will only be local changes. This means that in order to access your account and perform the windows login, someone would need to be physically sat in front of your PC. If someone tries to log in remotely, including yourself, you will still be asked to provide your password as the Windows 10 auto login process will only work this way.
Learn more about:
For this reason, bypassing the Windows login is considered to be relatively safe if there is no or a low chance of something obtaining physical access to your computer. If you routinely travel with your PC or you work in shared space, this might not be the best option as your device might easily become compromised. However, if you mostly use your device from home or have it in your possession at all times, then it’s highly unlikely that someone will actually be able to physically obtain your device. However, if you have confidential information or financial data on your laptop, you might want to take additional steps to protect those files; this can be done by using encryption tools that are available from a number of sources.
The vast majority of people who disable a login team on the laptop will do so because it is convenient and saves them time. It’s important to weigh the pros and cons of removing a password from a laptop before you do this.
Disable Login Password on MAC
If you’re wondering how to take a password of a Mac, follow these instructions to quickly disable this function. Doing it this way will mean that your Mac system will open and start without asking for a password during the start-up process.
#1 Go to the main Apple menu, then select the ‘users and groups’ option.
#2 Select the ‘lock’ option, then type if your current password.
#3 Select Mac ‘login options.’
#4 A pop-up screen will automatically open called ‘automatic login.’ You will then need to choose an account from the list. For security, you will be required to enter your password at this point.
Now that you understand how to get rid of the login screen on a MAC, you will be able to quickly and easily bypass the MAC login process when you next sign in. In order to test that you have correctly applied the changes, you should now log-off and try logging back in again.
ALTERNATIVE WAY TO REMOVE A PASSWORD FROM A MAC
If The above option does not work, then you can try following these instructions to remove the login screen from your MAC. Depending on your device and OS, sometimes the initial starting options present a little differently.
#1 Go to the main Apple menu, then select ‘system preferences.’
#2 Select ‘Accounts’
#3 On the bottom lower left side of the screen, choose ‘login options.’
#4 Ensure that the lock icon in the very left-hand side of the bottom of the screen is set to ‘unlocked.’
#5 A pop-up screen will automatically open called ‘automatic login.’ You will then need to choose an account from the list. For security, you will be required to enter your password at this point.
POSSIBLE ISSUES WITH DISABLE PASSWORD ON MAC
If the above doesn’t work, there could be a number of potential issues that are causing you not to be able to remove the password on a MAC. If you try to set-up automated login on a MAC and you notice that the automatic login menu option is greyed out, dimmed or missing entirely from the options next to the account name, it could be due to the fact that a manual login is required. Take a look at these points below to help you easily fix the issue.
1st Potential Cause of the Issue
If you have the File-Vault service enabled, this will usually insist on a manual login for all of the user accounts.
Solution
The only way around this if you want to disable the login process on a MAC is to switch off your File Vault Service.
2nd Potential Cause of the Issue
If your MAC account uses an iCloud password for its login, then a manual password entry will always be requested for that specific user account. There is also a possibility that you could see a message prompt like this, ‘A user with encryption on their home folder cannot automatically login.’
Solution
To remedy this, you can quickly and easily change the password on your MAC account and select the option to not use your iCloud password.
In Summary
Regardless of the type of device you have, you can follow the quick and easy stages in this post to help you know how to remove your login screen from either a Windows or a MAC. If you want to reverse the process and need to activate or reinstate the login in your computer, simply perform the same steps in reverse!
Hint: Place a bookmark or share this article to ensure you always have access to the right way to remove or reinstate a login and password screen on any device.
Additional Reads:
- SAST VS DAST
- Condusive IO
- Network Diagram Tools
- 2FA
- Wan VS Lan
- CSS Prevention
- Practice Hacking
- What is a Network Security Engineer?